By adding inline documentation in the p5.js source code, a reference can be automatically generated. This document outlines the tags and information to include in your documentation so that it shows up in the reference, formatted properly. The reference is auto-generated from the source code periodically, so it may take a few days for your documentation to show up in the reference. If it's been longer than a few days or you're having other problems email [email protected].
See below for the basics, more specifics about yuidoc style here. Please limit line length to 80 columns, starting new lines when it runs over.
List of examples needed (you can also view the most up to date list by building the library with grunt and looking at the log messages)
There are 4 kinds of elements: @class, @method, @property, @event.
You must specify one of these for the element to appear in the docs, with the name of the element after it. The description should appear on top. A few formatting tips:
- You can use markdown syntax to format the description text.
- Any function, variable, or constant name should be
monospacedby using single quotes on either side. - Double line breaks are recognized as new paragraphs. You do not need to insert
<br><br>tags. - When possible, link to other files when mentioning other function or variable names. For example, you can see the preload method linked in the description for loadImage.
- Here is yuidoc's reference for more syntax information.
   /**
    * The x component of the vector
    * @property x
    * @type {Number}
    */
    this.x = x || 0;
/**
* Draw an arc
*
* If x, y, width, height, start and stop are the only params provided, draws an
* open pie.
* If mode is provided draws the arc either open, chord or pie, dependant
* on the variable provided
*
* @param {Number} x x-coordinate of the arc's ellipse
* @param {Number} y y-coordinate of the arc's ellipse
* @param {Number} width width of the arc's ellipse by default
* @param {Number} height height of the arc's ellipse by default
* @param {Number} start angle to start the arc, specified in radians
* @param {Number} stop angle to stop the arc, specified in radians
* @param {String} [mode] optional parameter to determine the way of drawing the arc
*/ /**
*
* Calculates the magnitude (length) of the vector and returns the result
* as a float (this is simply the equation <em>sqrt(x*x + y*y + z*z)</em>.)
*
* @method mag
* @return {number} magnitude (length) of the vector
*/
PVector.prototype.mag = function () {
return Math.sqrt(this.magSq());
};For methods, any @params should be specified. They should not be formatted with spaces, tabs, etc, and should follow the standard:
@param {type} name Description here, no problem how long.
If the parameter is optional, add square brackets around the name:
@param {type} [name] Description here.
If the parameter takes one or more values defined in constants.js ,
then the type should be specified as {Constant} and the valid values should be enumerated in the comment following the either keyword, eg:
@param {Constant} horizAlign horizontal alignment, either LEFT, CENTER, or RIGHT
The @return is identical to @params, but without the name. It should be the last element in @method. The JS types are: String, Number, Boolean, Object, Array, Null, and Undefined. If there is no return type, do not include @return.
@return {type} Description of the data returned.
If the method returns the parent object, you can skip the @return and add this line instead:
@chainable
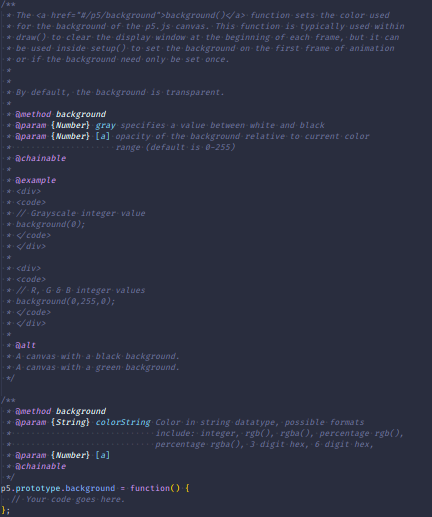
If a method has multiple possible parameter options, you can specify each individually. For example, see the examples for background under "syntax". To do this, choose one version to list as the first signature using the guidelines above. At the end of the documentation block, you can add additional signatures, each in its own block, following the example below.
/**
 * @method background
 * @param {String} colorstring color string, possible formats include: integer
 *                         rgb() or rgba(), percentage rgb() or rgba(),
 *                         3-digit hex, 6-digit hex
 * @param {Number} [a] alpha value
 */

/**
 * @method background
 * @param {Number} gray specifies a value between white and black
 * @param {Number} [a]
 */
Notes:
- If a parameter was given description previously, like
ain this case, you do not need to rewrite its description again. - It is not necessary to create a separate signature if the only difference between two signatures is the addition of an optional parameter.
- You can see two examples of this inline in the source code for background and color.
Use @final if a property or variable is a constant:
    /**
     * PI is a mathematical constant with the value 3.14159265358979323846.
     * @property PI
     * @type Number
     * @final
     */
    PI: PI
Use @private if a property or variable is a private variable (default is @public so no need to specify).
    /**
     * _start calls preload() setup() and draw()
     *
     * @method _start
     * @private
     */
p5.prototype._start = function () {The top of each file should contain a @module tag. Modules should correspond to JavaScript files (or require.js modules). They can work as groups in the lists of items. See here (the modules are COLOR, IMAGE, IO, PVECTOR, etc.).
/**
 * @module image
 */
define(function (require) {
  // code here
};
Constructors are defined with @class. Each constructor should have the tag @class followed by the name of the class, as well as the tag @constructor, and any @param tags required.
  /**
   * The p5 constructor function.
   * @class p5
   * @constructor
   * @param {Object} [node] The canvas element. A canvas will be added to the DOM if not provided.
   * @param {Object} [sketch] The sketch object.
   */
   const p5 = function( node, sketch) {
     ...
}Optionally, you can add examples with @example. Example code should be placed between <code></code> tags with comments included. Unless otherwise specified with a setup() function, each <code> block is automatically run on a canvas of 100x100 pixels with a gray background. Define all variables with let in examples, as the lowest barrier for beginners learning JS. Please see examples in other src files to make sure it is formatted correctly. If your example creates other HTML elements apart from the canvas, they will be rendered with a width of 100 pixels.
@example
<div>
<code>
arc(50, 55, 50, 50, 0, HALF_PI);
noFill();
arc(50, 55, 60, 60, HALF_PI, PI);
arc(50, 55, 70, 70, PI, PI+QUARTER_PI);
arc(50, 55, 80, 80, PI+QUARTER_PI, TWO_PI);
describe('shattered outline of ellipse created using four arcs');
</code>
</div>
You can have multiple examples for one function, just make sure you have only
one @example followed by each example having it's own <div> wrapping separated
by a line break.
@example
<div>
<code>
arc(50, 50, 80, 80, 0, PI+QUARTER_PI, OPEN);
describe('ellipse created using arc with its top right open');
</code>
</div>

<div>
<code>
arc(50, 50, 80, 80, 0, PI, OPEN);
describe('bottom half of an ellipse created using arc');
</code>
</div>
If you do not want the example to execute your code (i.e. you just want the code to show up), include the class "norender" in the div:
@example
<div class="norender">
<code>
arc(50, 50, 80, 80, 0, PI+QUARTER_PI, OPEN);
describe('ellipse created using arc with its top right open');
</code>
</div>
If you do not want the example to be run as part of the build tests (for example, if the example requires user interaction, or uses functionality not supported by the headless-Chrome test framework), include the class "notest" in the div:
@example
<div class='norender notest'><code>
function setup() {
  let c = createCanvas(100, 100);
  saveCanvas(c, 'myCanvas', 'jpg');
}
</code></div>
If you need to link to external asset files, put them in /docs/yuidoc-p5-theme/assets and then link to them with "assets/filename.ext" in the code. See the tint example.
Finally, for every example you add, you are required to use the p5.js function describe() in the example to create a screen-reader accessible description for the canvas. Include only one parameter: a string with a brief description of what is happening on the canvas. Do NOT add a second parameter.
@example
<div>
<code>
let xoff = 0.0;
function draw() {
  background(204);
  xoff = xoff + 0.01;
  let n = noise(xoff) * width;
  line(n, 0, n, height);
  decribe('vertical line moves left to right with updating noise values');
}
</code>
</div>

<div>
<code>
let noiseScale=0.02;
function draw() {
  background(0);
  for (let x=0; x < width; x++) {
    let noiseVal = noise((mouseX+x)*noiseScale, mouseY*noiseScale);
    stroke(noiseVal*255);
    line(x, mouseY+noiseVal*80, x, height);
  }
  describe('horizontal wave pattern effected by mouse x-position & updating noise values');
}
</code>
</div>
For more on describe() visit the web accessibility contributor docs.
Previous documentation guidelines required adding alt-text to create screen-reader accessible canvas description. THIS IS NO LONGER RECOMMENDED. ALWAYS USE describe(). Previously, alt-text was added with the tag @alt at the end of all of the examples for a given function (not an individual @alt tag under each), and an added a line break to separate the descriptions for multiple examples.
@example
<div>
<code>
let xoff = 0.0;
function draw() {
  background(204);
  xoff = xoff + 0.01;
  let n = noise(xoff) * width;
  line(n, 0, n, height);
}
</code>
</div>

<div>
<code>
let noiseScale=0.02;
function draw() {
  background(0);
  for (let x=0; x < width; x++) {
    let noiseVal = noise((mouseX+x)*noiseScale, mouseY*noiseScale);
    stroke(noiseVal*255);
    line(x, mouseY+noiseVal*80, x, height);
  }
}
</code>
</div>

@alt
vertical line moves left to right with updating noise values.
horizontal wave pattern effected by mouse x-position & updating noise values.
Here is an example for a well-documented method. To create a new method, you can use this template. Replace the text with your method's variables and remove the remaining ones.
- Run
npm run grunt yui:buildonce first to generate all local files needed, as well as a copy of the reference from the source code. Run it again anytime you make changes to the core JS files behind the yuidoc reference page. These are changes in files located in the yuidoc-p5-theme folder, NOT inline documentation changes to src. - If you only made changes to the source code, you can just run
npm run grunt yui, thoughnpm run grunt yui:buildwill also do the trick. - You can run
npm run docs:devto launch a live preview of the site that will update each time you make changes. (You will need to refresh the page after making changes to see them appear.)
The build reference can be found in docs/reference. To preview it locally, run npm run grunt yui:dev and view it as http://localhost:9001/docs/reference/.
The Spanish version is created a little differently. Here are instructions to update this material.